- Part 1: Getting Started.
- Part 2: How Figma Plugins Work.
- Part 3: Wiring Things Up
- Part 4: Working with Colours
- Part 5: Working with the UI. 👈 You are here
- Part 6: Polishing Things Up.
The code for this section is here.
In this chapter we are going to be manipulating the UI based on the updates we receive from the plugin sandbox. Go ahead and open up ui.html if you don’t have it open already and update it like this:
<div id="background">
  <h3 id="foreground">The quick brown fox</h3>
</div>
<h2 id="contrast"></h2>
<script>
  window.onmessage = async event => {
    const message = event.data.pluginMessage
    console.log(message)
    if (message.type === 'selectionChange') {
      const background = document.getElementById('background')
      const foreground = document.getElementById('foreground')
      const contrast = document.getElementById('contrast')
      background.style = `background-color: ${message.background};`
      foreground.style = `color: ${message.foreground};`
      contrast.textContent = message.contrast
    }
  }
</script>
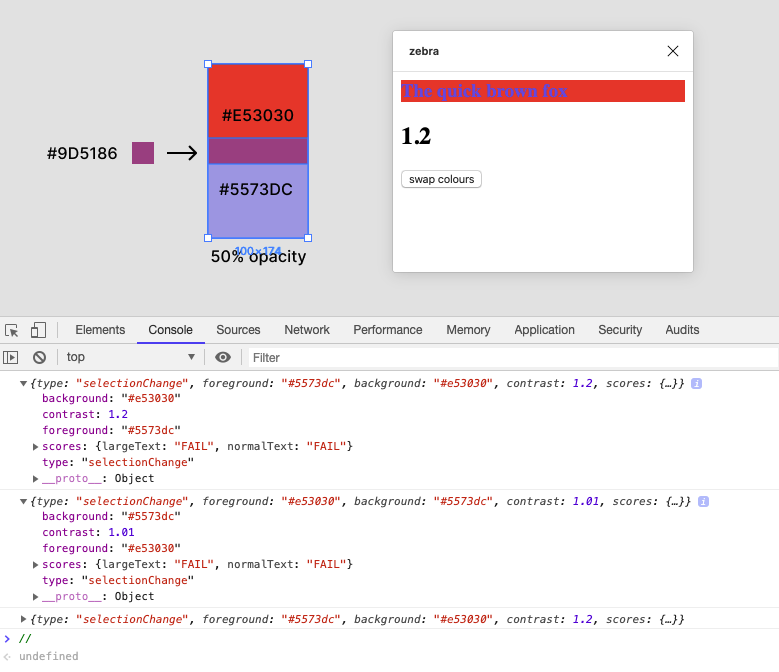
We added some html to display some of our results and in <script/> we are using some browser methods to find and alter those html elements when we receive a new message.
If we click around we should see the plugin UI update:

🔁 Swapping the Foreground and Background
If you are like me, you’ll be a bit annoyed that we can’t swap the two colours around. This is especially annoying because the order of the layers in figma.currentPage.selection is basically random so we can’t reliably pick which layer will be which.
To solve this we are going to add a button to the UI to swap the current colours around. When the button is clicked we want to post a message back to the sandbox to swap those colours around. This is what the message posting looks like on this end:
// ...
<button id="swap"></button>
<script>
  window.onmessage = async event => {
    //...
  }
  document.getElementById('swap').onclick = () => {
    parent.postMessage({ pluginMessage: { type: 'swap' } }, '*')
  }
</script>
We get the button and assign an onclick handler to it. This handler fires off parent.postMessage to send a message from the iframe and give it a type of swap.
Then in the code.js we need to listen for the message using figma.ui.onmessage listener:
figma.ui.onmessage = msg => {
  if (msg.type === 'swap') {
      console.log(msg)
    }
  }
}
If we run the plugin now and press the swap button we should see console logging out the message with type swap.
So we are getting the message but how are we going to swap the colours around?
Well we have been moving the current colours into variables at the top of the code.js file for this reason. Every time a selection changes we assign the relevant colours to these variables so now all we need to do is swap those variable values around and calculate the contrast again.
//..
let foregroundAlpha
let backgroundAlpha
//...
  if (msg.type === 'swap') {
    if (figma.currentPage.selection.length > 1) {
      ;[foregroundColor, backgoundColor, foregroundAlpha, backgroundAlpha] = [
        backgoundColor,
        foregroundColor,
        backgroundAlpha,
        foregroundAlpha,
      ]
      const contrast = calculateContrast(foregroundColor, foregroundAlpha, backgoundColor)
      sendContrastInfo(contrast, foregroundColor, backgoundColor)
    }
  }
}
One of the ways we can do this is like this ☝. ️Using arrays to swap the values of the variables without having to use a bunch of temporary variables. This is called Destructuring Assignment Array Matching, which really rolls off the tongue. Notice that we have also added a backgroundAlpha variable so that swapping the colours provides the right opacity.
In fact, if it weren’t that we need to handle foreground opacity, we wouldn’t have to re-calculate the contrast at all. The contrast ratio between two solid colours never changes, regardless of foreground or background position.
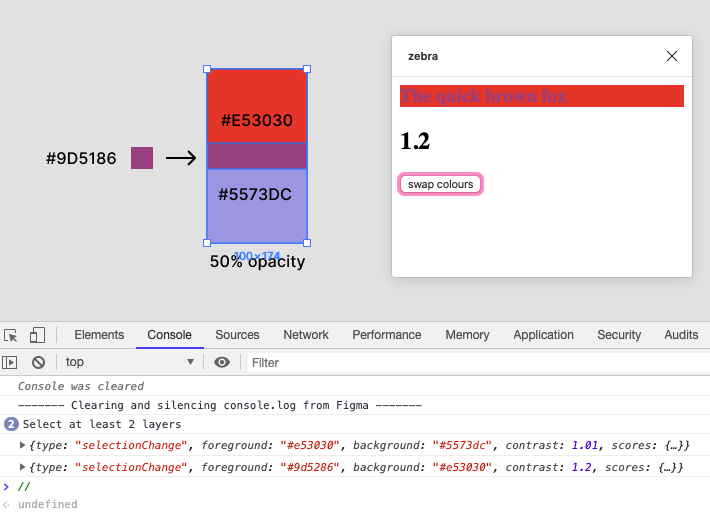
Go ahead and open this up in Figma and test it out. You should see the foreground and background colours swapping:
This is awesome. The colours are swapping and the score is being recalculated — which we can see when testing on colours with opacity.
🩺 Fixing a Structural Problem
There is one problem though. The foreground colour is being sent as the original solid colour instead of the new blended colour we produce from our overlay() function.
Why? Well that’s because when we call sendContrastInfo() we are calling it with our global colour variables and we haven’t updated that to have our new blended colour.
So how can we fix this? Well this is a bit of a structural hole we have dug ourselves but the clear solution is to move our sendContrastInfo() call to be inside the calculateContrast() function. This will give it access to the new overlaid colour. The downside of this is now calculateContrast() does more than one thing which is not super clean code. For now we are just going to deal with that by renaming the function so that it’s clear it has side effects:
function calculateAndSendContrast(foreground, alpha, backgound) {
  // ...
  let contrast = foregroundLuminance / backgroundLuminance
  if (backgroundLuminance > foregroundLuminance) {
    contrast = 1 / contrast
  }
  contrast = Math.floor(contrast * 100) / 100
  return sendContrastInfo(contrast, foreground, backgound)
}
Remember to call it with the locally scoped foreground and background parameters as arguments and not the globally scoped foregroundColor and backgroundColor. Then we remove the sendContrastInfo() call from our listeners:
figma.on('selectionchange', () => {
  if (figma.currentPage.selection.length > 1) {
    // assigning values from selection
    calculateAndSendContrast(foregroundColor, foregroundAlpha, backgoundColor)
  }
})
figma.ui.onmessage = msg => {
  if (msg.type === 'swap') {
    // swapping variable values
      calculateAndSendContrast(foregroundColor, foregroundAlpha, backgoundColor)
    }
  }
}
Now in Figma we can see the right colour value is being sent to the UI:
Phew 😓. That was a lot. But the good news is that is all the sandbox functionality we need!
In the final chapter we are going to clean up the UI and look into some optional improvements like bundling things with webpack.