“Should designers code?
F*ck yeah!” — socrates
Figma plugins are the new shiny thing in the design. From the outside it might seem like they are complicated to build but that’s not true. They are about as complicated as you make them and getting started with plugins is super easy.
If you’ve ever wanted to build your own you’re in the right place.
🏗 What are we building?
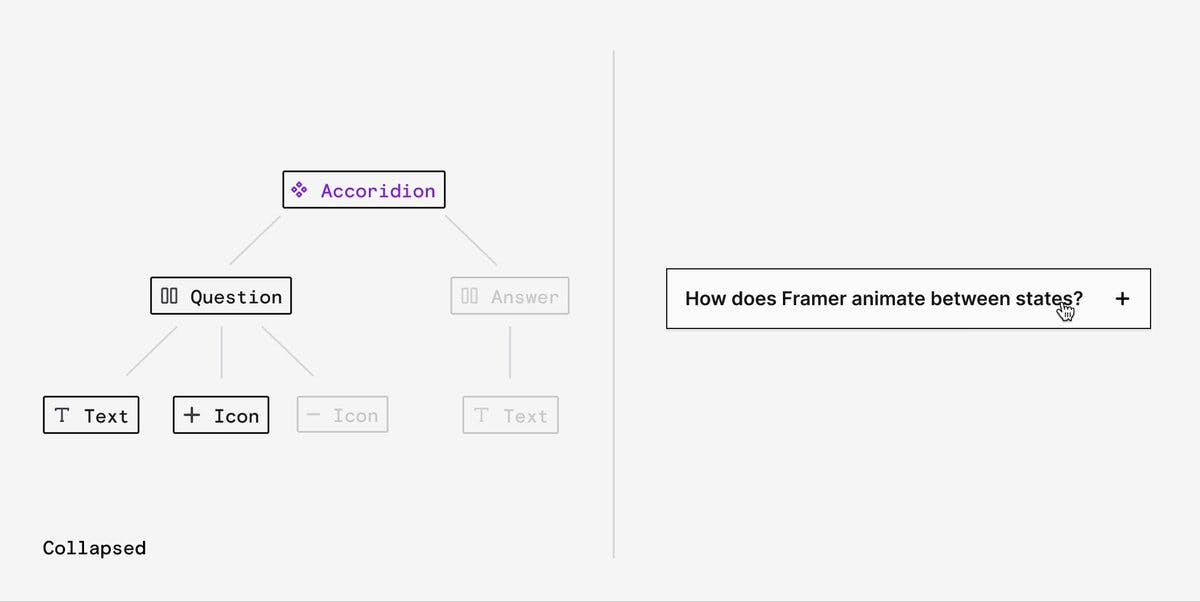
We are going to build this 👆, a lightweight and flexible colour contrast checker called zebra 🦓
There are 6 parts including this one but you can bounce around however you want:
- Part 1: Getting Started. 👈 You are here
- Part 2: How Figma Plugins Work.
- Part 3: Wiring Things Up
- Part 4: Working with Colours
- Part 5: Working with the UI.
- Part 6: Polishing Things Up.
The repo for the plugin is here. It’s split up into steps to make it easier to follow.
👨👩👧 Who is this Tutorial for?
I guess the sweet-spot is a designer-who-codes-a-little or a developer-who-designs-a-little.
If you spend all day writing JavaScript you might find it a little slow.
If you have never written JavaScript you might feel a little lost.
If you have ever partially understood a Mark Dalgleish tweet, you should do just fine.

Mark Dalgleish 🧁💿@markdalgleish
January 29, 2020
https://t.co/9CVyefxMwg

2
8
100
🚀 Getting Started.
Luckily for us Figma has done some amazing work on the plugin creation process.
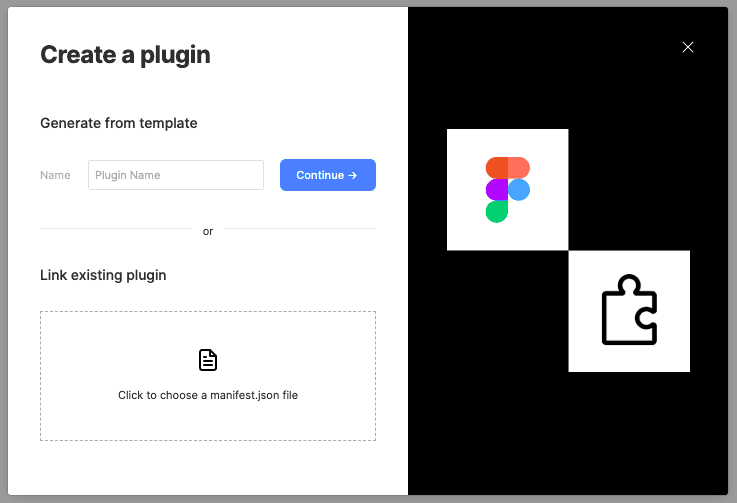
All we need to do is hit Plugins -> Development -> New Plugin in the menu bar. After that we’ll get to a dialog where we need to add the plugin name or link to an existing plugin. Enter zebra here and press Continue.
We’ll get another dialog that allows us to pick from three different templates:
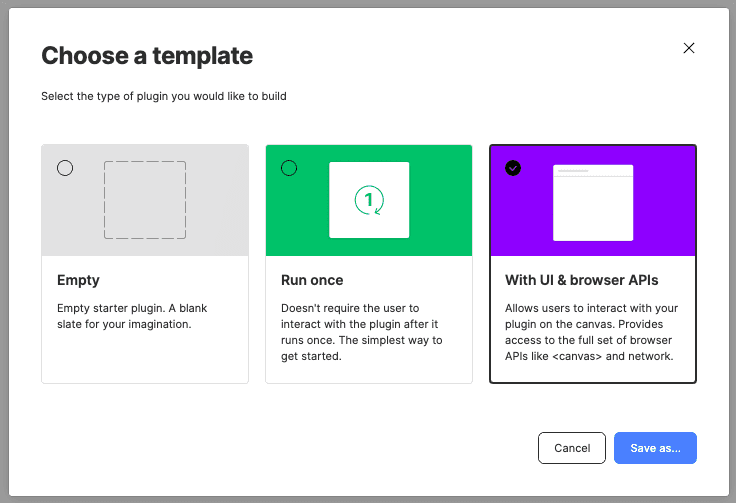
For our case we want the user to interact with our plugin because they might want to check the contrast on multiple parts of their designs, so we are going to pick the 3rd option.
Let’s take a minute to talk through the options here and what they give us. All three of these just add some template files to a folder:
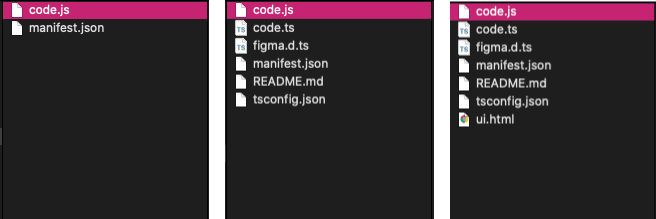
- Empty provides a dead simple code.js file and a manifest.json. The manifest file is how Figma identifies plugins. It contains stuff like the plugin name, API version etc.
Only use this one if you are happy to configure stuff on your own. - Run Once comes with a few more files but most of them are to enable Typescript:
code.tsis a Typescript file that you can use instead of code.js.
-figma.d.tsis a list of all the types the API uses. VSCode uses this to do nifty auto-complete stuff.tsconfig.jsonconfigures Typescript.
- With UI and Browser APIs has all the the same files as Run Once, but it also has a ui.html file. This is because we are expecting the user to interact with our plugin and this file will be what launches in the little plugin window.
__
TYPESCRIPT TRIGGER WARNING
All this TypeScript talk is a little daunting but don’t worry we aren’t going to be writing any TypeScript in this tutorial. We can still write our plugin in JavaScript we just won’t get all the nifty autocomplete magic™ that running a TypeScript server enables.
The last dialog of this process asks you where you want to download the template files. My folder structure looks like this Documents -> dev -> FigmaPlugins -> zebra but where you put it is up to you. I’d avoid placing it on the Desktop or in Downloads because you might accidentally delete it.
If you don’t already have it, download VSCode and install it. VSCode is a text editor that in recent years has become really popular in the JavaScript (and TypeScript) world. You can use whichever text editor you feel comfortable with but you might not get all the autocomplete magic™.
In VSCode, open up the folder you downloaded the template files into and navigate to README.md. You’ll see that here we have a few instructions for setting up the TypeScript compiler which we will completely ignore. In fact you can delete the code.ts and all the other typescript files if you want. Feel free to write your own little README.md to replace this.
🎤 Testing 1, 2…
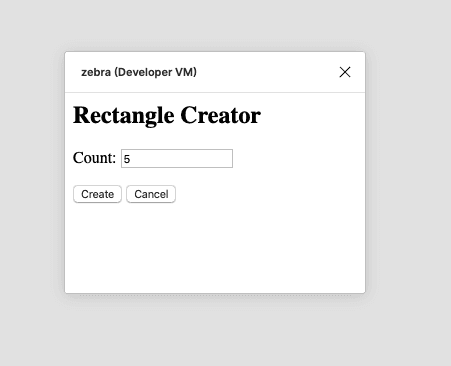
Open code.js and you’ll see there is a bunch of example code there. You can read the comments but essentially this creates a plugin window where a user can select the number of rectangles they want to add to a file.
Open up Figma again and launch the plugin by hitting Plugins -> Development -> zebra in the menu. You should see this:
If you click Create you should see this:

Now we need to make sure our template is working properly by editing something in code.js. On line 19 change the color from:
color: { r: 1, g: 0.5, b: 0 }
to:
color: { r: 1, g: 0.5, b: 1 } }
and hit cmd + s to save. If we run the plugin in Figma again we should now see this:
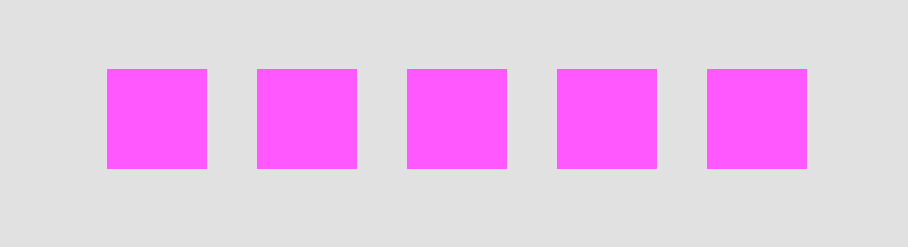
This means our template is up and running and we can get on to the more interesting stuff. 🎉