- Part 1: Understanding the API.
- Part 2: Setting up a server.
- Part 3: Setting up Figma.
- Part 4: Making a request.
- Part 5: Processing the response.
- Part 6: Setting up a front-end. 👈 You are here
- Part 7: Finishing up.
You can find the code for this tutorial here.
In Part 5, we managed to get a bunch of image urls from the Figma endpoint. Before we can display them, we need to set up some sort of front-end.
Step 5: Set up a front-end.
So in this section we are going to step away from our server for a bit, and rig up a front-end in React that’ll display the results we fetch from Figma. You can totally do this part in whatever front-end you want.
What is React?
If you work within 50 metres of a developer, there’s about a 1000% chance you have heard/read about React. Depending on the developer, it’s either the best thing since the internet or the latest in a long list of javascript-bloatware fads.
But what is it? Well it’s a javascript front-end framework for the web.
This is a convoluted way of saying that it allows us to write HTML (and CSS) in JavaScript.
Why is that cool? Because it allows us to easily make re-usable components, much like you would in Sketch or Figma. It also does a lot of clever-things™️ under the hood that enable it to dynamically update parts of the page without reloading the whole page.
These are things that HTML can’t do on it’s own, so using a framework like React saves developers a lot of time and makes for better web applications.
Why React?
It’s hot-shit right now.

No, but really. There are other frameworks like Vue or Angular but React is sort of the darling framework at the moment and that gives it one advantage that’s very useful to beginners: a flourishing ecosystem.
Because of it’s popularity there are tons of high quality tools and resources for it. This means we write less code overall and the learning curve is a little less steep because tons of people have walked the path before us.
Setting it up.
In step 2 we installed create-react-app. This is a sort of an official template React project that comes with a lot of tedious stuff already set up. If you want to, you can install it globally so it will be available to use in other projects:
npm install create-react-app --global
Next we need to tell it to set up a template. We want to use the client template so that we can easily configure it to talk to our backend.
create-react-app client
This might take a while, and you should notice a a new folder called client that has this inside of it:
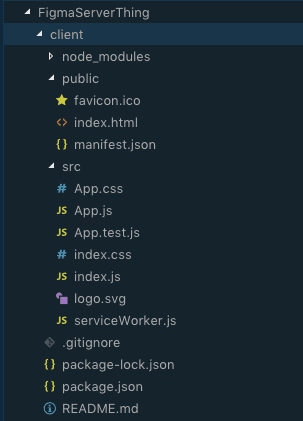
You might notice that there is a new package.json inside this client folder. This is because this client is a separate project to the backend one we have been working on, so they will have their own set of dependencies.
Navigate into the client directory with cd client and then run the development server that create-react-app set up for us by running the npm start command. This launches a server with our little React app on port 3000. So you should see something like this in your browser:
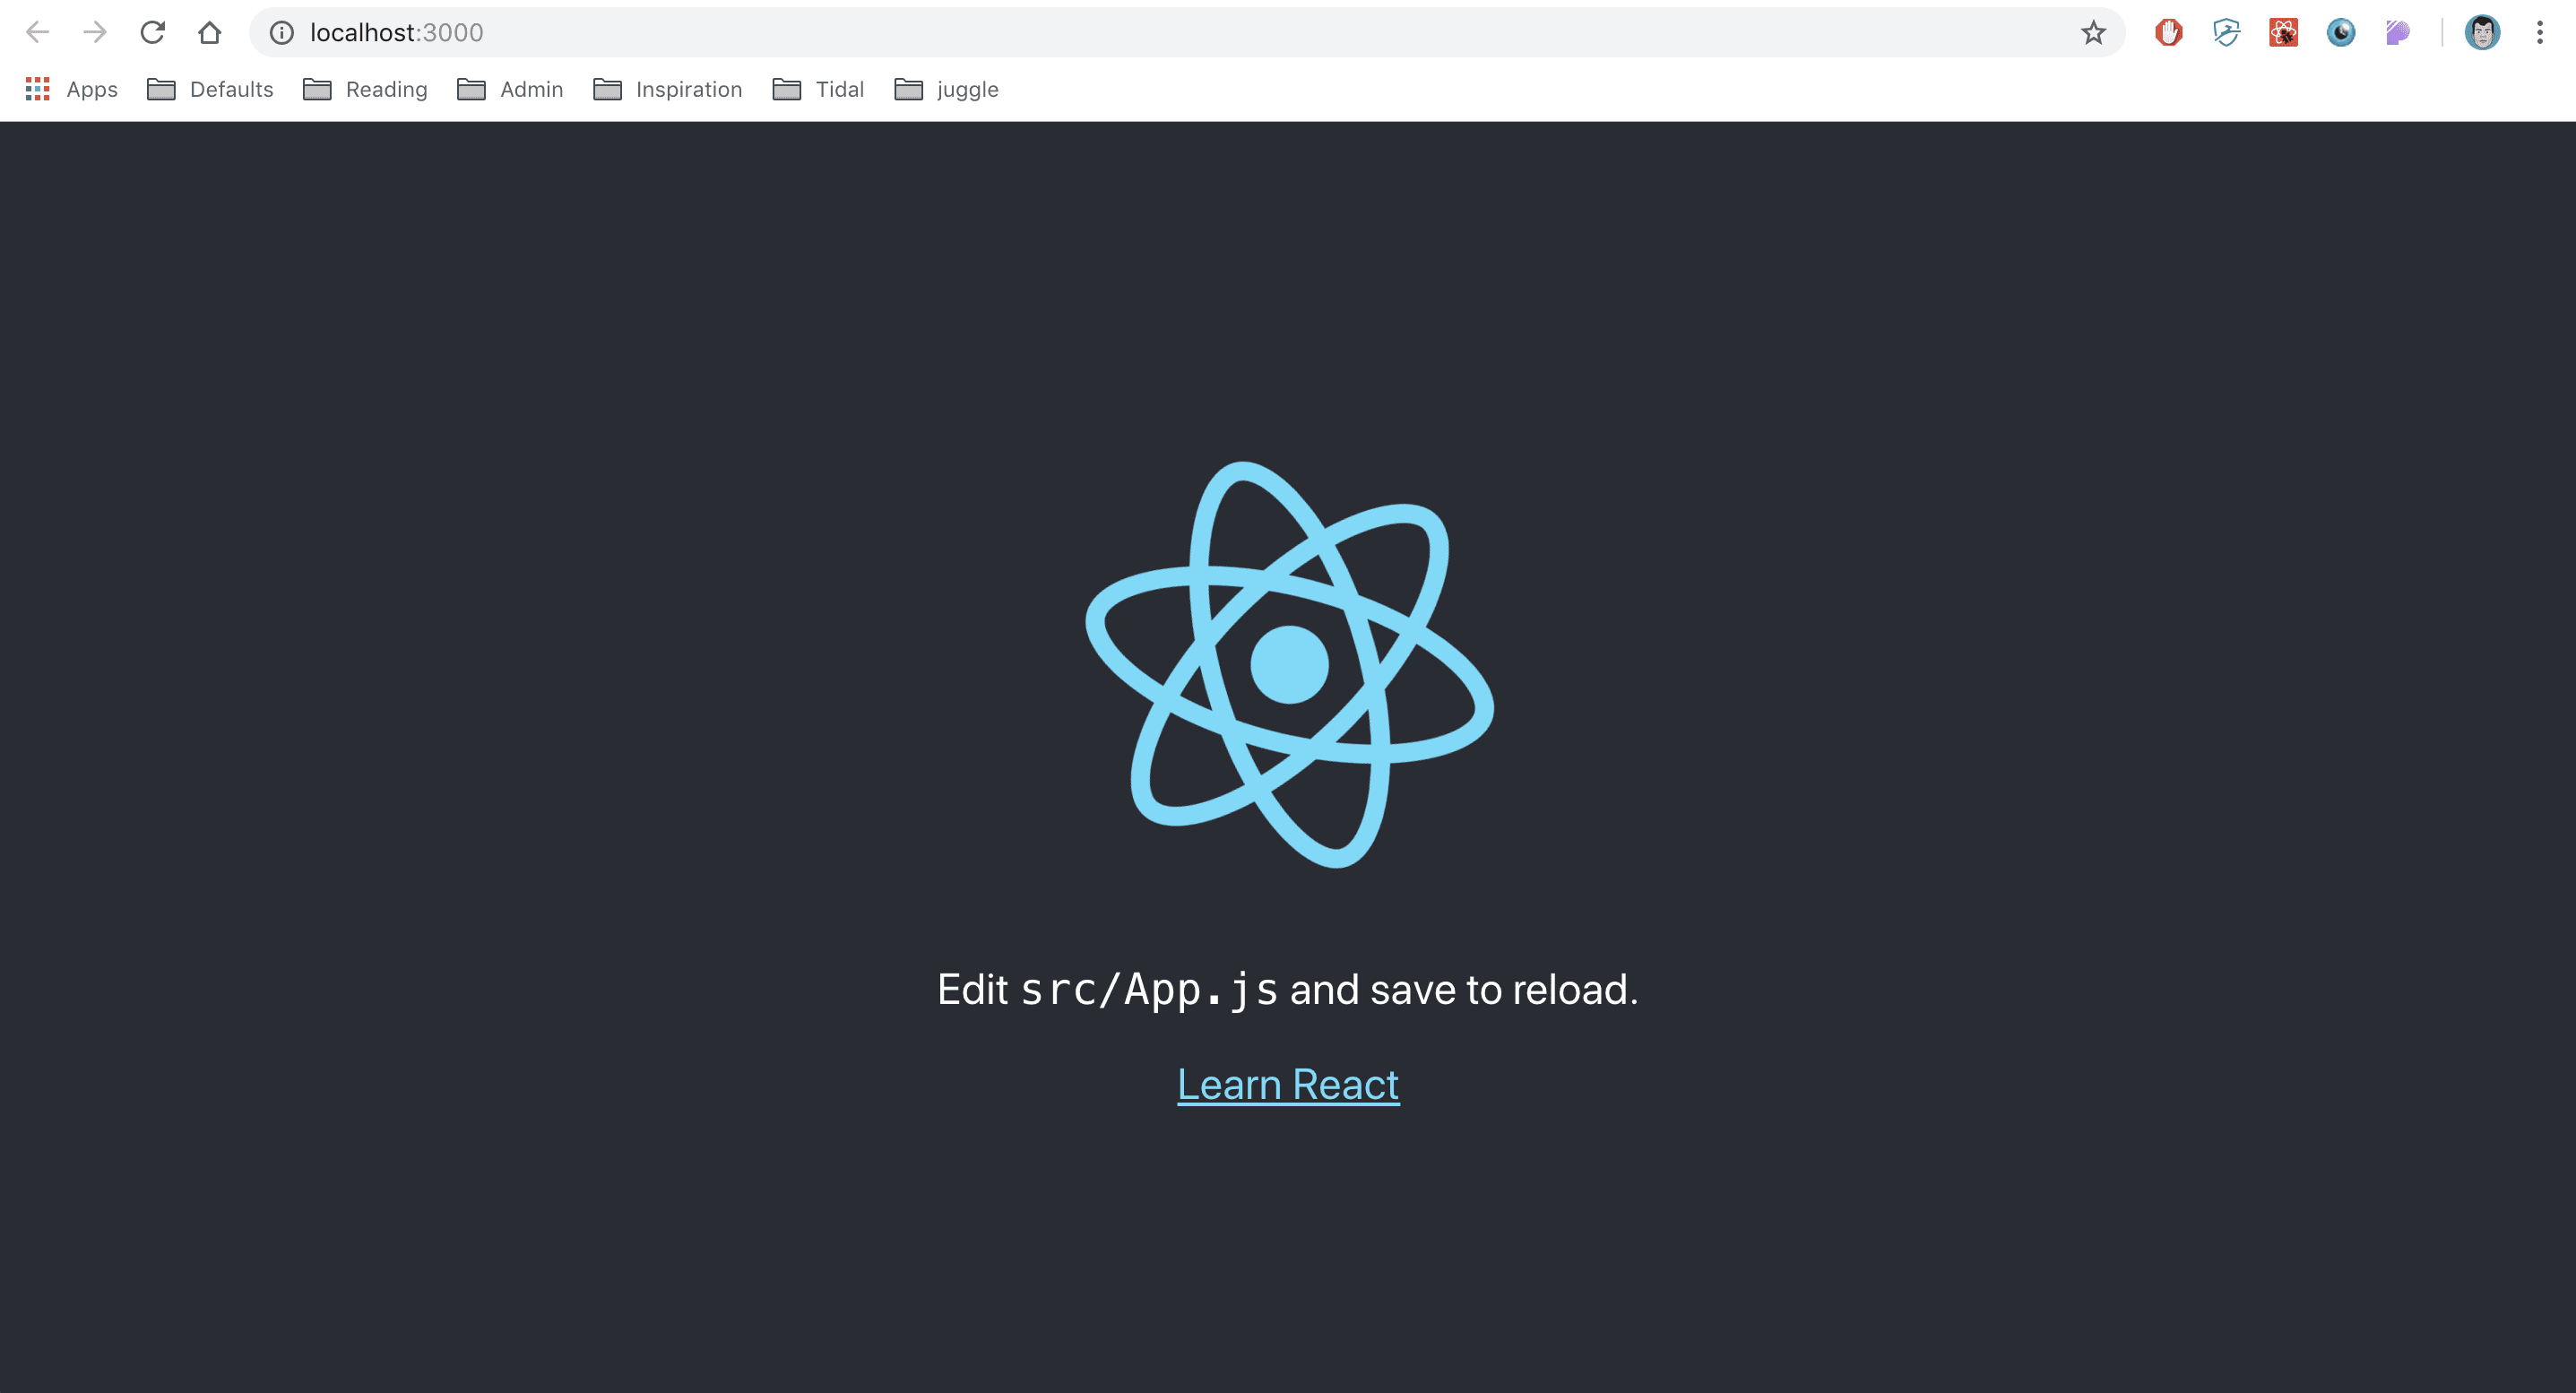
Okay, so in a very basic way, our React app is up and running.
Getting our two servers talking
So we have this nice shiny front-end running on one port, and this backend running on another… But how do we get the front-end client thing talking to our specific server? Well we need to open up the package.json inside the client folder and add the following line:
"proxy": "http://localhost:3001",
So our the file looks something like this:
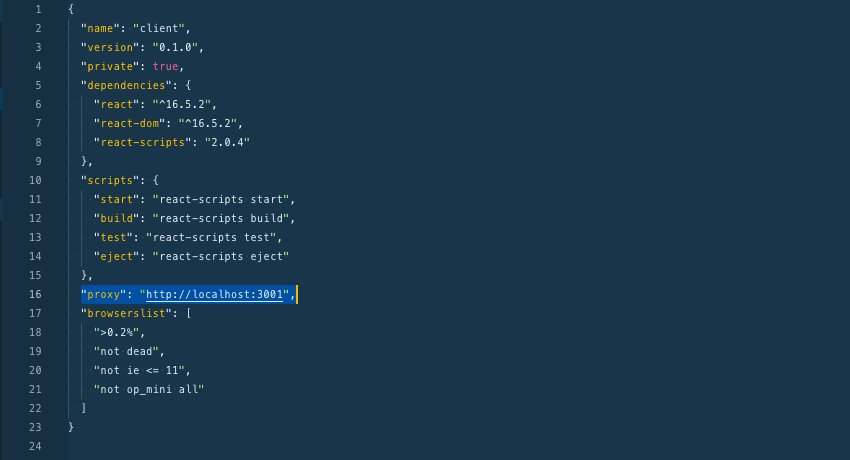
This little line forwards the client to our backend server, which you might remember we run on http://localhost:3001.
Before going any further make sure you have both the front-end and back-end running. To do this you need to have two terminal windows open. The front-end server runs out of
FigmaServerThing/clientwith the commandnpm startand the backend runs out of the rootFigmaServerThingwith the samenpm startcommand.
That’s all we need to do here.
In the final part, we configure our React app to fetch the data from our server and display it on screen.

