- Part 1: Understanding the API. 👈 You are here
- Part 2: Setting up a server.
- Part 3: Setting up Figma.
- Part 4: Making a request.
- Part 5: Processing the response.
- Part 6: Setting up a front-end.
- Part 7: Finishing up.
You can find the code for this tutorial here.
At TIDAL, we have a comprehensive design system built in Figma. A little while ago, I decided to have a look at how we could use the Figma API to improve and maybe automate our workflow around this.
The problem I instantly ran into is that there are basically no resources out there demonstrating how to use it, especially at a lower technical level. So I thought I would write a little bit about how to get up and running and using the API.
It is a design tool after all, maybe designers should be able to use it. (This might be painfully slow for a more technical reader)
What you’ll need
- A text editor. VSCode is good and free.
- Figma.
- macOS. (It should be trivial to adapt the example to Windows, but I rely on the terminal quite a lot.)
Step 1: How the API works
In essence the API is just a set of URLs, that we call endpoints. We can send requests to these endpoints and get responses back from them. The type of endpoint dictates what sort of stuff you get back. There are 10 endpoints currently available:
- GET file — returns file info in JSON.
- GET file nodes — returns individual node info.
- GET file images — returns images for specific elements.
- GET file versions — returns the version history for a file.
- GET image fills — returns download links for images in the file.
- GET comments — returns a list of file comments.
- POST comments — posts a comment.
- GET me — returns authenticated user info.
- GET team projects — returns a list of projects.
- GET project files — returns a list of files in a project.
Before we carry on we should probably talk about what the API does not let us
do: edit Figma files.
You might notice from the list of endpoints
above that all except one has theGETprefix before it. This means the
we only have view-level access to those endpoints. The POST Comments endpoint lets us add a comment but that’s as far as it goes.
Update from 2022:
While this is still true, you can now manipulate Figma documents with plugins
Understanding the workflow
So what if we wanted to get a few screens from a file and display them? The basic workflow would go as follows:
-
Step 1:
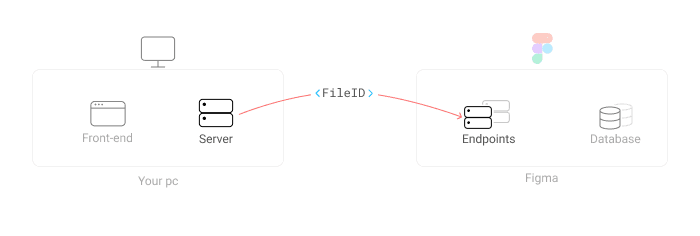
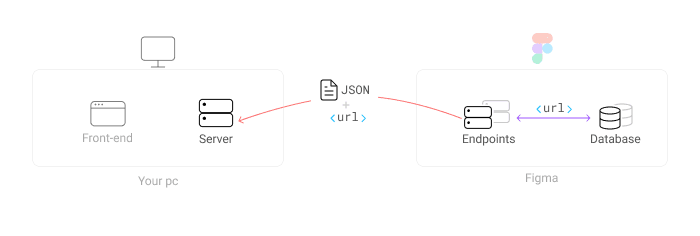
We send a request to theGET Fileendpoint with the URL of our file as an endpoint.
-
Step 2:
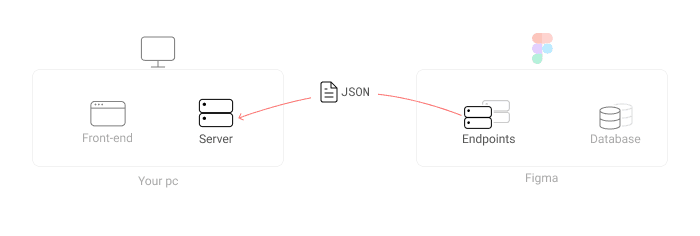
We get a response in return. This will be a chunk of JSON that contains all the information for every element inside that file. You can think of this as a giant list that describes all the attributes every element has (and doesn’t have).
-
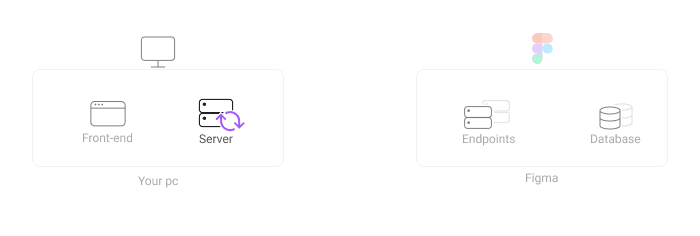
Step 3:
We iterate through this chunk of information and find the screens we want to display. Each element in a Figma file has a unique ID we need.
-
Step 4:
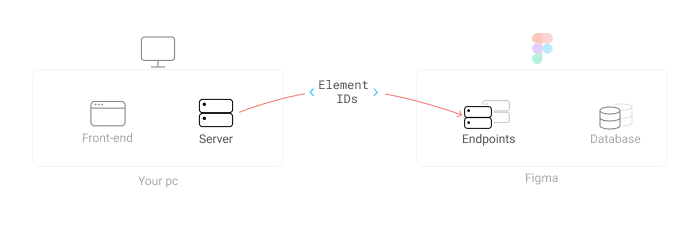
Once we have found those IDs, we send them along with a new request, this time to theGET File imagesendpoint.
-
Step 5:
That endpoint will then send us some more JSON, but this time it will contain URLs. These URLs are where the images of our screens are hosted by Figma.
-
Step 6:
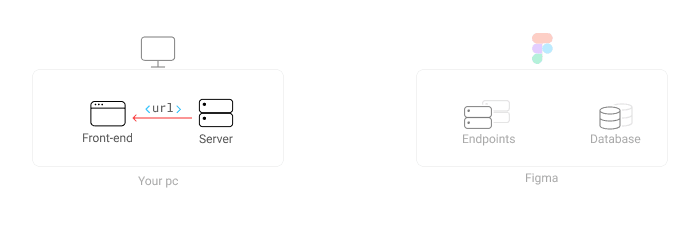
We send those URLs to our frontend to display them as images.
In Part 2 we are going to set up a server which will communicate to the Figma API endpoints. I promise it’s not as hard as it seems.
If you want more super long, boring content like this make sure to follow me here. If you want some short-form boring content, follow me on twitter.
